Why Woodworking Glue Joints Fail and How to Get Strong Glue-Ups Every Time
The clamps came off after a full night of cure time. The joint looked solid. Then you picked up the panel and it separated along the glue line with almost no resistance, sometimes with a clean pop that tells you the glue never actually bonded.
A failed glue joint is frustrating because the process seemed correct. The glue went on, the clamps went on, and time passed. Understanding what actually causes glue joints to fail changes the way you approach every glue-up before the first clamp touches the wood.
Why Do Woodworking Glue Joints Fail?
Glue joints fail when the bond between the glue and the wood fiber is weaker than the stress the joint experiences. That weakness comes from one of four consistent causes: insufficient clamping pressure, glue that skinned over before the joint closed, contaminated surfaces, or a joint that did not fit accurately before glue was applied.
Each cause produces a different type of failure that is recognizable after the fact.
Insufficient Clamping Pressure
Yellow PVA glue (the standard woodworking glue used in most garage workshops) bonds by penetrating into the wood fiber and creating a mechanical lock as it cures. That penetration requires direct contact between both surfaces and enough clamping pressure to hold them tight while the glue cures.
Insufficient pressure leaves glue in the gap between surfaces rather than driven into the fiber, producing a joint that looks glued but has minimal actual bond strength.
The failure surface of an underpressured joint shows glue on both faces with little or no fiber transfer, meaning the wood itself was never engaged.
The required clamping pressure varies by wood species. Softwoods require less pressure than hardwoods because the fibers compress more easily. For most furniture hardwoods, 100 to 150 pounds per square inch of clamping pressure across the joint surface is a reasonable target.
Open Time Exceeded Before Closing
Every glue has an open time, which is the window between application and joint closure during which the glue remains workable. Once the glue begins to skin over, adding clamping pressure does not reactivate it. The result is a joint where the cured skin prevents penetration into the wood fiber even under correct clamping pressure.
Standard yellow PVA glue has an open time of approximately five to ten minutes at room temperature. Complex assemblies with many joints, wide panels, or large frames can easily exceed this window if the glue is applied all at once before any pieces are positioned.
Working in sections, using a longer open-time glue for complex assemblies, or having a dry-run rehearsal before applying glue are the practical ways to stay within open time on larger glue-ups.
Contaminated Mating Surfaces
Glue does not bond reliably to surfaces that have oil, wax, finish residue, or excessive machine dust. Freshly jointed or planed surfaces bond better than surfaces that were milled days before and have been handled repeatedly.
Hand oils transferred from carrying boards without gloves, silicone from spray lubricants used on tools, and finish residue from previous coats are the most common contaminants in a garage workshop. These are invisible to the eye but prevent fiber penetration reliably.
Wiping mating surfaces with a clean rag dampened with mineral spirits and allowing full evaporation before gluing removes most surface contamination. Freshly prepared surfaces within an hour of gluing are consistently more reliable than surfaces prepared the day before.
Poor Joint Fit
A glue joint is only as strong as its fit. Yellow PVA glue is not a gap filler. It is a contact adhesive that requires close-fitting surfaces to develop full strength. A joint with a visible gap across its width distributes clamping pressure unevenly, leaves glue bridging across open space rather than bonding fiber to fiber, and fails at a fraction of the strength of a tight joint.
Gaps in edge joints come from boards that are not straight, from a jointer fence that is not square to the table, or from planer snipe left on the ends of boards that prevents flat contact across the full length. Every gap in a joint is a potential failure point.
How to Get Strong Glue-Ups Every Time
Do a Complete Dry Run Before Applying Glue
Assemble the entire joint or panel without glue and clamp it to verify fit, clamp placement, and assembly sequence. The scrap pieces left from milling are useful for testing clamp placement and caul positioning, which is another reason keeping offcuts organized pays off at assembly time. A dry run reveals gaps, misaligned pieces, and clamping problems before the glue clock is running.
Note which clamps are needed, in what order, and where cauls or pads are required to distribute pressure. Having everything staged and ready before glue is applied is the most effective way to stay within open time on complex assemblies.
Prepare Fresh Surfaces Immediately Before Gluing
Joint or plane mating surfaces on the day of glue-up, not the day before. Freshly milled surfaces also have more stable moisture content, and controlling moisture during assembly is a key part of preventing wood from warping after the project is built. If surfaces were prepared in advance, a light pass with a hand plane or a wipe with mineral spirits immediately before gluing improves bond reliability significantly.
Avoid touching mating surfaces with bare hands after preparation. Handle pieces by the ends or edges that will not be part of the glue joint.
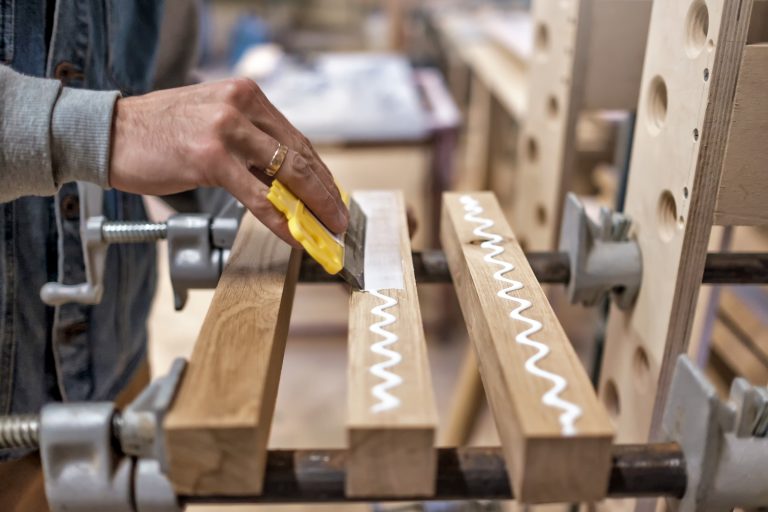
Apply Glue to Both Mating Surfaces
Applying glue to both faces of the joint rather than one ensures complete coverage and reduces the risk of dry spots that create weak areas. Use a foam roller, a brush, or a plastic spreader to apply an even layer across the full surface.
The correct glue film is thin enough to be translucent, not a thick bead. Excess glue produces squeeze-out that needs cleanup but does not improve bond strength.
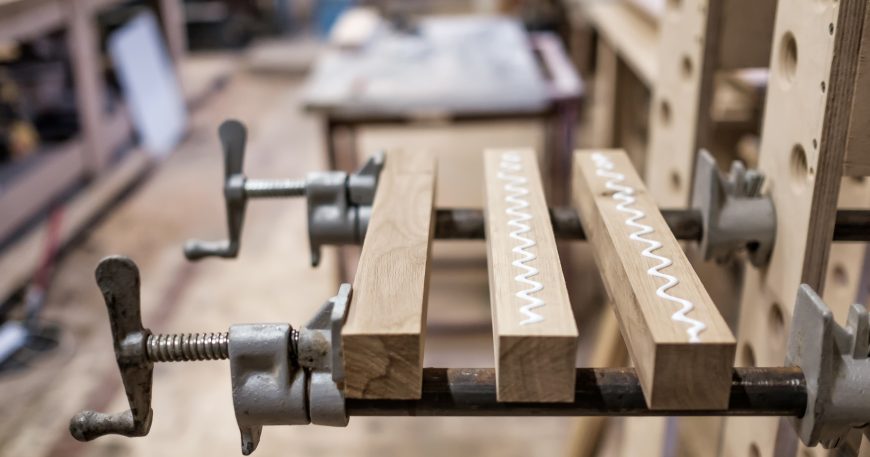
Use Enough Clamps at the Right Spacing
For edge glue-ups, clamps placed every eight to twelve inches along the joint length distribute pressure evenly. Fewer clamps or wider spacing leaves areas of the joint under-pressured regardless of how tight the clamps feel at their locations.
Cauls, which are straight boards clamped perpendicular to the joint across the panel face, help distribute clamping pressure across the width of the panel and keep the assembly flat during cure. Without cauls, individual clamps can create bowing across the panel width as pressure is applied.
Does Glue Type Matter for Joint Strength?
For most furniture applications, standard yellow PVA woodworking glue produces a bond stronger than the surrounding wood when applied correctly to clean, close-fitting surfaces. The glue itself is rarely the weak point in a failed joint. The joint fit, surface condition, and clamping are almost always the cause.
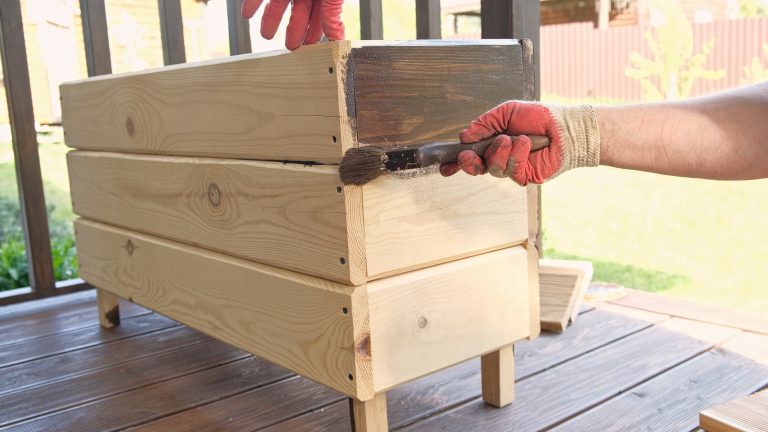
Polyurethane glue is sometimes used as a gap filler because it expands slightly during cure. It is more moisture resistant than PVA but more difficult to clean up and produces a foamy squeeze-out that is harder to remove. For standard furniture work in a garage workshop with normal moisture conditions, PVA outperforms polyurethane in most situations.
Epoxy is appropriate for joints requiring gap filling or exceptional moisture resistance. For standard furniture joinery with tight-fitting surfaces, it offers no advantage over PVA and is significantly more expensive.
👉 Book a demo today and see how Woodshop Master helps your shop grow without limits.
FAQ: Table Saw Cut Accuracy
How long should I leave clamps on a PVA glue joint?
Standard yellow PVA reaches handling strength in one hour at 70 degrees Fahrenheit and full cure strength in 24 hours. Removing clamps after one hour is acceptable for non-stressed handling but the joint should not be stressed or machined until full cure. In cold shop conditions below 55 degrees, PVA does not cure properly and should not be used.
Can I reglue a failed joint after it separates?
Yes, if the failure surfaces are clean. If both faces show clean wood fiber with no glue residue, the joint was starved of glue and can be reglued after light sanding. If both faces are coated with cured glue, scrape or sand the glue layer off completely before regluing. Glue does not bond reliably to cured glue.
Why does my glue joint show a dark glue line?
A dark glue line usually indicates a gap in the joint that the glue filled rather than wood fiber it bonded to. This is a sign of poor joint fit. The remedy is to remill the mating surfaces until they close without gaps before regluing.
What temperature is too cold for wood glue?
Standard yellow PVA should not be used below 55 degrees Fahrenheit. Below that temperature the glue does not cure properly and produces a weak, crumbly bond that can fail under minimal stress. In a cold garage workshop in winter, bringing the wood and glue indoors to a heated space for the glue-up and initial cure period is the most reliable solution.
How much squeeze-out is normal?
A small, consistent bead of squeeze-out along the full length of the joint is the target. No squeeze-out usually means insufficient glue was applied. Heavy squeeze-out means too much glue was used, which wastes glue and creates cleanup work without improving strength. Squeeze-out should be allowed to gel slightly before removal with a chisel or damp cloth.

