


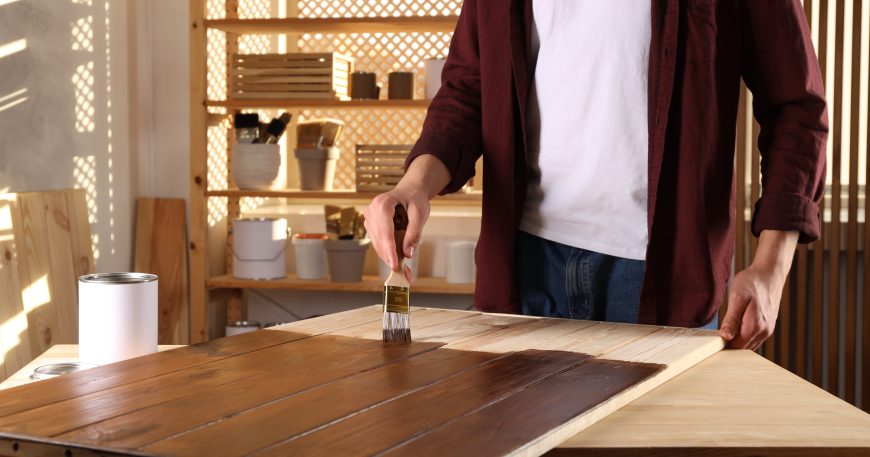
How to Apply Polyurethane Without Bubbles, Brush Marks, or Drips
You spent hours building and sanding the piece. The surface felt smooth, the wood looked clean, and the polyurethane went on with what felt like a careful, even application. Then it dried and the surface looked worse than the bare wood. Bubbles trapped in the film, brush marks frozen into the finish, drips hardened on the edges.
Applying polyurethane correctly is not complicated, but it requires a specific sequence of preparation and application steps that most beginners skip because the can instructions make the process sound simpler than it is. This guide covers what actually causes each common polyurethane problem and how to fix it before it happens.
Why Does Polyurethane Go on Badly?
Applying polyurethane without defects requires correct surface prep, the right brush, controlled application technique, and environmental conditions that allow the finish to level before it begins to cure. When any one of these variables is wrong, the result shows in the dried film regardless of how carefully the finish was brushed on.
The three most common defects each have a different primary cause, and fixing the wrong variable wastes time without solving the problem.
Bubbles Come From Air, Not Applicator Pressure
Bubbles in a polyurethane finish are introduced by one of three sources: shaking the can before use, applying the finish too quickly with a back-and-forth scrubbing motion, or using a foam brush that traps air in the applicator itself.
Polyurethane should never be shaken before application. Shaking introduces thousands of tiny air bubbles into the finish that take far longer to settle than the open time of the finish allows. Stir polyurethane slowly with a clean stick before use and never shake the can.
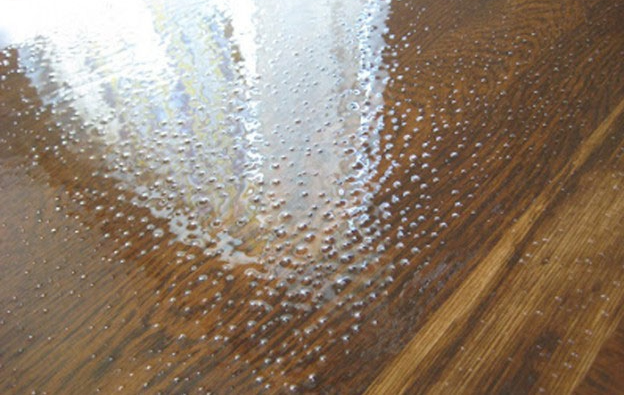
Foam brushes trap air in their cell structure and release it into the wet film as the finish is applied. Natural bristle brushes for oil-based polyurethane and synthetic bristle brushes for water-based polyurethane release significantly fewer bubbles and produce a smoother film.
Brush Marks Come From Overworking Wet Finish
Polyurethane has a limited window during which it remains workable. Going back over an area that has already begun to tack up drags the partially cured surface and creates ridges that freeze in place as the finish cures fully.
Each stroke should be applied once in a single direction and left alone. The finish levels itself during the cure window if the coat was applied correctly. Returning to fix a visible brush mark after the finish has begun to set makes the problem worse, not better.
Environmental temperature also affects brush marks. Polyurethane applied in a cold garage cures more slowly and has a longer window to level, which is an advantage. In a warm shop, the cure window shortens and brush marks have less time to flow out before the finish begins to set.
Drips Come From Too Much Finish on Vertical Surfaces
Drips on edges and vertical surfaces mean too much finish was applied in a single coat. Polyurethane on a vertical surface has no support against gravity, and any area where the finish is too thick will flow downward before it cures.
Thin coats on vertical surfaces are more important than on horizontal faces. A coat that looks slightly thin when applied is almost always the correct amount for a vertical surface. The finish builds with multiple coats rather than a single heavy application.
How to Apply Polyurethane Correctly
Prepare the Surface Before the First Coat
Surface preparation determines the quality of every coat that follows. Sand the bare wood through a complete grit progression ending at 180 or 220, remove all sanding dust with a vacuum and then a tack cloth, and confirm the surface is completely dry before opening the finish. The same surface preparation that matters for polyurethane adhesion also determines whether wood stain goes on evenly or comes out blotchy.
Oil and wax contamination on the wood surface prevents adhesion of the first coat and causes fisheye, a defect where the finish pulls away from small areas of the surface in circular patterns. Wiping down the surface with a clean cloth dampened with mineral spirits for oil-based polyurethane or denatured alcohol for water-based, and allowing full evaporation, removes surface contamination before the first coat.
Thin the First Coat for Better Penetration
Thinning the first coat of oil-based polyurethane ten to fifteen percent with mineral spirits improves penetration into the wood fiber and produces better adhesion for subsequent coats. A thinned first coat also levels more easily and is less prone to brush marks than full-strength finish applied directly to bare wood.
Water-based polyurethane should not be thinned with mineral spirits. If thinning is needed for water-based products, use distilled water at no more than five percent by volume, and only if the manufacturer’s instructions permit it.
Apply in Long, Overlapping Strokes With the Grain
Load the brush fully but without excess dripping. Apply in long, smooth strokes following the grain direction, overlapping each stroke by approximately one third of the brush width. At the end of each stroke, lift the brush gradually rather than stopping abruptly, which leaves a mark at the endpoint.
Tip off each section by dragging a nearly dry brush very lightly across the wet surface in one direction immediately after applying the finish. This tipping pass breaks surface bubbles and smooths brush marks while the finish is still fully wet.
Work in sections small enough to complete before the leading edge begins to tack. On a large tabletop, this typically means working in strips across the width rather than attempting to cover the entire surface in one pass.
Sand Between Every Coat
Sanding between coats removes dust nibs, levels any remaining brush marks, and provides mechanical adhesion for the next coat. The same technique used to eliminate sanding swirl marks before finish applies between polyurethane coats, where circular scratch patterns left by power sanding become visible under the cured film Use 320-grit sandpaper for oil-based polyurethane between coats and 400-grit for water-based.
Sand lightly with the grain until the sheen is uniformly dulled across the entire surface. Any areas that remain shiny were not sanded and will not bond as reliably with the next coat. Remove all sanding dust with a vacuum and tack cloth before applying the next coat.
Do not sand the final coat. After the last coat is fully cured, the surface can be rubbed out with 0000 steel wool or a fine abrasive pad for a smoother sheen if desired, but sanding the final coat removes material that cannot be replaced without adding another coat.
Apply a Minimum of Three Coats
One coat of polyurethane provides minimal protection and shows every surface imperfection underneath. Two coats are the practical minimum for light-use surfaces. Three coats are the standard for furniture and tabletops that will see regular use, with each coat building thickness and protection.
The final coat appearance is directly related to how well the surface was prepared before it went on. A final coat applied over a well-sanded and tack-clothed surface looks significantly better than the same finish applied over a dusty or poorly prepared intermediate coat.
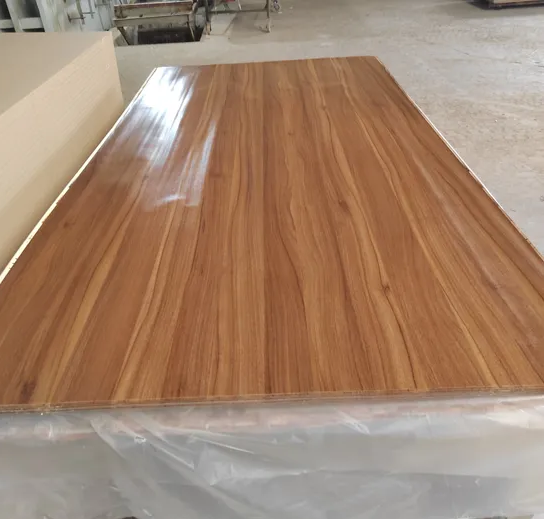
Oil-Based vs. Water-Based Polyurethane: Which Is Easier to Apply?
Both products have advantages for a beginner in a garage workshop. Oil-based polyurethane has a longer open time, which gives more opportunity to correct brush marks before the finish begins to set. It produces a warm amber tone that many woodworkers prefer on natural wood. The disadvantage is longer dry time between coats (typically eight to twelve hours) and stronger solvent fumes that require adequate ventilation.
Water-based polyurethane dries clear without the amber tone, has significantly less odor, and allows recoating in two to four hours. The shorter open time is less forgiving for beginners on large surfaces, and the water base raises wood grain slightly, which requires a light sanding after the first coat to smooth the raised fibers before subsequent coats.
For a beginner’s first project using polyurethane, oil-based is more forgiving in terms of application time, while water-based is more practical in a garage workshop with limited ventilation.
👉 Book a demo today and see how Woodshop Master helps your shop grow without limits.
FAQ: Table Saw Cut Accuracy
Why does my polyurethane look cloudy after drying?
Cloudiness in a dried polyurethane film usually means the finish was applied in conditions that were too cold or too humid. Oil-based polyurethane should not be applied below 65 degrees Fahrenheit or above 70 percent relative humidity. Water-based polyurethane is more sensitive to humidity and should be applied in conditions below 50 percent relative humidity when possible.
How long should I wait between polyurethane coats?
Oil-based polyurethane typically requires eight to twelve hours between coats at room temperature. Water-based requires two to four hours. In a cold garage, both products take longer and should be allowed to cure fully before sanding and recoating. If the previous coat pulls up as a gummy residue when sanding, it has not cured fully.
Can I use a roller instead of a brush for polyurethane?
A short-nap foam roller (three-sixteenths inch) produces fewer brush marks than a brush on large flat surfaces but introduces more bubbles. Using a roller to apply the finish followed immediately by a light tipping pass with a brush gives the coverage advantage of the roller while reducing bubbles. This combination works well on tabletops and wide panels.
Why does polyurethane peel off after drying?
Peeling means adhesion failed between the finish and the wood or between coats. The most common causes are surface contamination on bare wood before the first coat, insufficient sanding between coats, or applying a coat over one that had not fully cured. Peeling finish must be fully removed and the surface re-prepped before refinishing.
How do I fix runs and drips after the polyurethane has dried?
Wait until the drip is fully cured, then sand it flat with 220-grit sandpaper until the drip area matches the surrounding surface level. Apply a light coat of polyurethane over the sanded area and allow to cure. On a final coat, the repaired area may show a slightly different sheen, which can be minimized by rubbing out the entire surface with 0000 steel wool after the repair coat cures.

