



How to Get Rid of Sanding Swirl Marks Before You Apply Finish
The wood felt perfectly smooth under your hand. You ran through the grits carefully, wiped away the dust, and applied the stain with confidence. Then the swirl marks appeared, faint circular scratches scattered across the surface, completely invisible before finish and impossible to ignore after.
Sanding swirl marks are one of the most frustrating problems in finishing because the damage was already there before the first coat went on. The sanding felt fine. The surface looked fine under shop lighting. The finish simply revealed what the eye could not catch beforehand.
Why Do Sanding Swirl Marks Appear Under Finish?
Sanding swirl marks become visible under finish because the stain or topcoat pools differently in micro-scratches than on the surrounding flat surface, creating contrast that reads as a circular pattern. These scratches are created by the rotating motion of a random orbital sander and are present on almost every power-sanded surface, but they only become visible once finish changes the way light reflects off the wood.
Under normal shop lighting at a typical viewing angle, these scratches are far too shallow to see. The same surface under raking light, which is light striking at a low, sharp angle, reveals the pattern clearly before any finish is applied.
Why a Random Orbital Sander Always Leaves Some Pattern
A random orbital sander combines a circular spinning motion with a smaller random oscillation, which is what prevents the deep, directional scratch patterns left by older orbital sanders. This design significantly reduces visible scratching compared to straight-line sanding but does not eliminate fine circular marks entirely, particularly when too much pressure is applied or the sander is held in one spot too long.
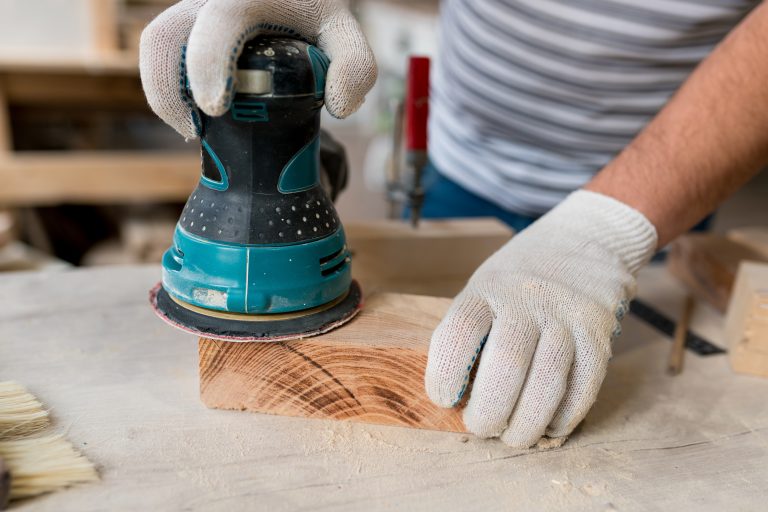
The faster the grit progression skips steps, the deeper the remaining scratch pattern from the coarser grit, and the more visible the resulting swirl marks become once finish is applied.
How to Get Rid of Sanding Swirl Marks Before Finishing
Use Raking Light to Inspect Before Any Finish Goes On
This single habit catches more swirl mark problems than any sanding technique alone. Hold a work light or a portable lamp at a low angle close to the surface, almost parallel to the wood, and move it slowly across the entire piece in a dark or dimly lit area.
Every scratch, swirl mark, and uneven sanding pass becomes visible under this lighting that is completely invisible under normal overhead shop lights. Catching these marks before finishing means correcting them with more sanding rather than discovering them after a coat of stain has locked them in permanently. Test scraps from organized offcuts kept on hand are useful for practicing the raking light inspection technique before applying it to the actual project.
Work Through a Complete Grit Progression Without Skipping
Skipping from 80 grit directly to 220 grit leaves the deeper 80-grit scratch pattern unremoved beneath a surface that only looks smooth. A complete progression of 100, 120, 150, and 180 or 220 grit ensures each step fully removes the scratch pattern of the previous grit rather than simply polishing over it.
Spend adequate time at each grit level rather than rushing through the sequence. A common mistake is moving to the next grit before the previous one has fully removed the prior scratch pattern across the entire surface. Inconsistent sanding grit across a project is also a leading cause of why wood stain goes on blotchy instead of even.
Finish With Hand Sanding in the Direction of the Grain
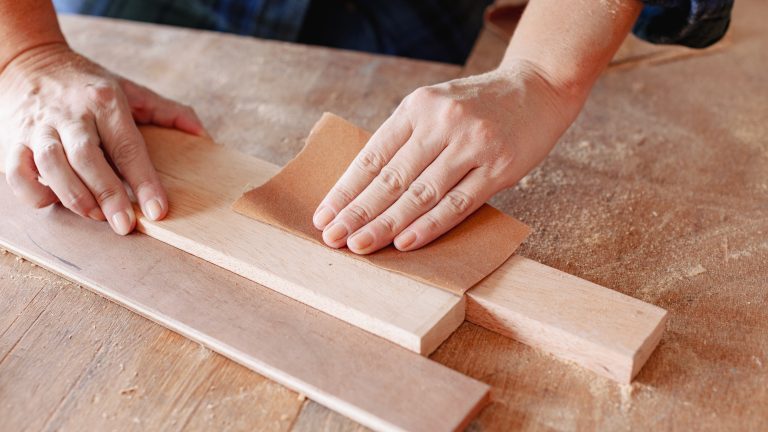
This is the step most beginners skip, and it is the most effective fix for residual swirl marks. After the final orbital sanding pass, sand by hand using the same final grit, moving only in the direction of the wood grain, never in circles.
This hand-sanding pass removes the faint circular pattern left by the orbital sander’s rotation while following the grain direction the wood naturally wants to be sanded in. It typically takes only two to three minutes per square foot and makes a significant difference in how the surface accepts stain evenly.
Reduce Sander Pressure and Dwell Time
Excessive downward pressure on a random orbital sander forces it to cut more aggressively and can deepen the circular scratch pattern rather than reducing it. Letting the sander’s own weight do the work, combined with steady continuous movement rather than pausing in one spot, produces a more even scratch pattern that is easier to fully remove with subsequent grits.
Dwelling too long in one area, even with light pressure, creates a locally deeper scratch pattern that stands out once finish is applied, particularly visible at the edges where a sander naturally tips slightly during use.
Does Sandpaper Quality Affect Swirl Marks?
Yes, meaningfully. Worn sandpaper with dulled or clogged grit cuts less efficiently and tends to skip and bounce across the surface, which creates an inconsistent scratch pattern rather than a clean, even one. Fresh sandpaper changed regularly during a sanding session produces more consistent results and reduces the likelihood of deep, isolated scratch marks.
A general guideline is replacing the disc once it no longer feels sharp to the touch or shows visible clogging with sanding dust, typically every ten to fifteen minutes of continuous use on softwood and sooner on resinous or oily hardwoods.
What About Swirl Marks That Have Already Been Finished Over?
If swirl marks are discovered after a finish coat has already been applied, the finish needs to be removed from the affected area before correction is possible. For an oil-based stain with no topcoat yet applied, sanding back through the stained layer to bare wood, then re-sanding through the full grit progression with the hand-sanding finish step, resolves the issue before reapplying stain.
For a piece that already has a topcoat applied over the swirl marks, the repair requires sanding through the topcoat and the stain layer in the affected area, blending carefully with the surrounding finish, then reapplying both stain and topcoat to match. This is significantly more time-consuming than catching the problem before the first coat, which is why the raking light inspection step is worth the extra few minutes on every project.
👉 Book a demo today and see how Woodshop Master helps your shop grow without limits.
FAQ: Table Saw Cut Accuracy
Why do swirl marks show up more on some wood species than others?
Open-grain woods like oak hide minor surface scratches better because the natural grain texture masks fine scratch patterns. Tight-grain, light-colored woods like maple and birch show swirl marks much more clearly because there is less natural texture to disguise the scratch pattern, and the light wood color creates more visible contrast under stain.
Can I prevent swirl marks entirely by using a higher grit?
A higher final grit alone does not prevent swirl marks. The circular pattern comes from the sander’s motion, not just the grit size. Even very fine grits like 220 or 320 leave a faint circular pattern if the final hand-sanding step in the direction of the grain is skipped.
Is it normal to see some swirl marks under raking light even on a well-sanded piece?
A small amount of extremely fine texture is normal and generally not visible once finish is applied if the grit progression was complete and a hand-sanding pass was performed. Distinct, visible circular patterns under raking light indicate the progression was incomplete or the hand-sanding step was skipped.
Does the type of finish affect how visible swirl marks become?
Yes. Gloss finishes reveal surface imperfections, including swirl marks, far more than satin or matte finishes because gloss reflects light directly rather than diffusing it. A penetrating oil finish reveals less surface texture than a film-building finish like polyurethane or lacquer.
How long should I spend hand sanding after using an orbital sander?
For most furniture-sized panels, two to three minutes per square foot with the grain using the same final grit as the orbital sander is sufficient. Larger panels and tabletops where finish quality is critical may warrant additional time, particularly on light-colored, tight-grain woods that show imperfections most readily.

