
How to Improve Table Saw Accuracy: Fence, Blade, and Setup Fixes
You already know your cuts are not perfectly straight. Maybe you fixed the obvious problems and the saw still does not produce the repeatable, dead-on accuracy you need for tight joinery and clean glue-ups. Table saw accuracy is not a single adjustment. It is a complete calibration system where fence, blade, and setup all work together.
This guide goes beyond basic troubleshooting and walks through the full process of tuning a table saw for consistent, repeatable accuracy. If your saw is currently producing inconsistent cuts with an unknown cause, diagnosing the specific problem first will save time before working through this calibration process.
What Does Table Saw Accuracy Actually Require?
Table saw accuracy requires three systems working in alignment at the same time: the fence relative to the blade, the blade relative to the miter slot, and the blade height and angle relative to the material. When all three are correctly calibrated and verified with measurement rather than assumption, the saw produces consistent results across different materials, cut lengths, and operators.
Most garage workshop table saws are never fully calibrated out of the box. Factory tolerances are often loose enough to produce visible inaccuracy in fine furniture work, even on saws that feel solid and well-built.
Why a Once-and-Done Setup Does Not Work
Table saws move out of calibration over time from vibration, transport, blade changes, and normal use. If your saw is currently cutting inconsistently with no clear cause yet identified, start by diagnosing why your table saw cuts are not straight before working through this full calibration process. Treating table saw accuracy as a system to maintain rather than a single setup performed once is the difference between a saw that stays accurate for years and one that needs constant troubleshooting.
A practical maintenance schedule includes checking blade-to-miter-slot alignment quarterly for a saw in regular use, checking fence parallelism before any project requiring tight tolerances, and checking blade height calibration any time the blade is changed.
Setting Up the Fence for Maximum Accuracy
Achieve True Parallel Alignment
The fence must be parallel to the blade within 0.002 to 0.005 inches across its full length for accurate furniture work. Measure from the blade to the fence at the front tooth, then rotate the blade by hand and measure at the back tooth using the same reference point on the blade.
If the measurements differ, most fence systems include adjustment bolts at the head that allow fine repositioning. Make small adjustments, retest, and repeat until both measurements match. This single calibration step resolves the majority of accuracy complaints in garage workshop table saws.
Set the Correct Toe-Out Tolerance
A small amount of toe-out, meaning the back of the fence sits a few thousandths of an inch farther from the blade than the front, prevents binding on long rip cuts without sacrificing meaningful accuracy. Toe-in, where the back of the fence sits closer to the blade than the front, should never be present because it pinches the workpiece against the blade and causes burning, kickback risk, and inaccurate cuts.
Aim for zero to 0.003 inches of toe-out as a starting calibration target for furniture-grade accuracy.
Verify Fence Lock Rigidity Under Load
A fence that measures correctly when locked but shifts under cutting pressure undermines every other calibration step. Apply firm hand pressure against the fence in the direction the workpiece would push during a cut and confirm zero movement. Any detected movement means the locking mechanism needs adjustment or the fence rail needs cleaning before further calibration is worthwhile.
Calibrating the Blade for Table Saw Accuracy
Align the Blade to the Miter Slot With Precision
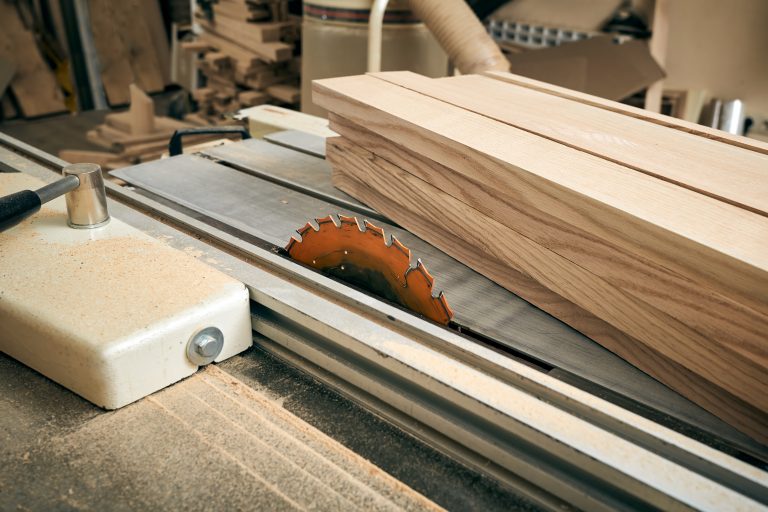
This is the foundation calibration for improving table saw accuracy and should be verified before any fence adjustment, since a fence set parallel to a misaligned blade is still inaccurate relative to the miter slot.
Mark a single tooth, raise the blade fully, and measure from that tooth to the miter slot at the front of the blade. Rotate the same tooth to the back position and measure again. Both readings should match within 0.002 inches for precision work. Adjustment requires repositioning the trunnion, which varies by saw model and should follow the manufacturer’s specific procedure.
Check and Correct Blade Tilt Calibration
Accurate 90-degree and 45-degree blade stops are essential for table saw accuracy on angled cuts. Most saws have set screws that control the mechanical stop at these common angles, but factory calibration is frequently off by a degree or more.
Use a reliable engineer’s square against the blade body, not the teeth, since tooth set can introduce a small but meaningful error. Adjust the stop screws until the square shows zero gap at both the top and bottom of the blade, confirming the blade is flat against the square along its full height.
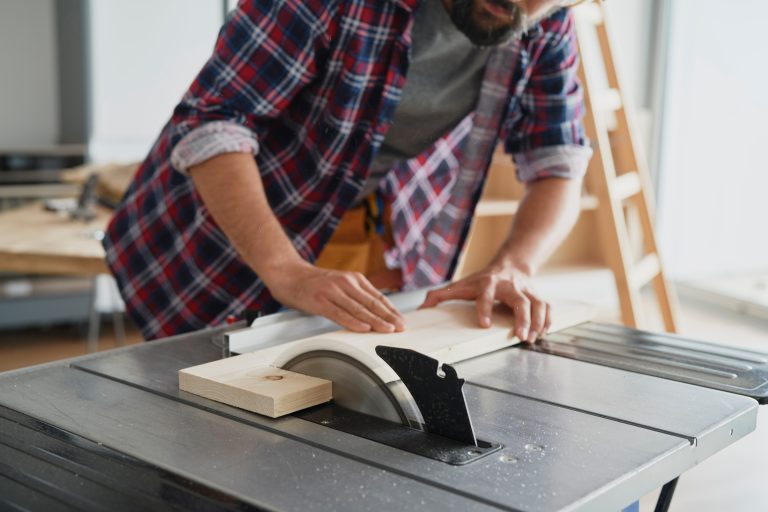
Set Blade Height for Optimal Cut Quality
Blade height affects both cut quality and accuracy in ways many woodworkers overlook. A blade set too low for the material thickness increases tear-out and can affect cut straightness as the material binds against more tooth surface during the cut.
A practical target for most cuts is setting the blade so the gullets (the curved area between teeth) clear the top of the material by approximately a quarter inch. This provides clean chip clearance while minimizing the blade surface in contact with the wood, which reduces friction-related accuracy problems.
Setup Elements That Support Long-Term Accuracy
Install and Maintain a Splitter or Riving Knife
A splitter or riving knife prevents the kerf from closing behind the blade during a rip cut, which is a common cause of binding, burning, and inaccurate cuts on longer material. A riving knife that moves with the blade height maintains correct clearance automatically, while a fixed splitter requires manual adjustment whenever blade height changes significantly.
Misaligned splitters that are not parallel to the blade introduce their own accuracy problems by pushing the workpiece slightly off line during the cut.
Use Featherboards for Consistent Pressure
Inconsistent hand pressure during a cut is one of the most common sources of variable accuracy between otherwise identical setups. A featherboard mounted to apply steady, consistent pressure against the fence keeps the workpiece tracking accurately along its full length, particularly valuable for narrow rip cuts where hand position is limited.
Calibrate Your Measuring and Marking Tools
Table saw accuracy depends on accurate measurement at every step, not just the saw setup itself. A combination square that is not truly square, or a tape measure with a bent hook end, introduces error before the saw is even involved. Verify your primary square against a known accurate reference and check your tape measure hook for play or damage before relying on either for calibration work. Keeping calibration tools in a dedicated, known spot is part of the same habit that prevents losing time searching for tools at the start of every session.
Does Blade Selection Affect Overall Accuracy?
Yes, in ways connected to but separate from mechanical calibration. A full-kerf, properly sharpened blade with minimal runout performs more predictably than a thin-kerf blade under heavy cutting load, where flex can introduce subtle inaccuracy invisible during a quick visual check.
Quality blade selection complements correct calibration but cannot replace it. A premium blade installed on a misaligned saw still produces inaccurate cuts, while a properly calibrated saw with a quality combination blade produces consistently clean, accurate results across most furniture-grade material.
A Repeatable Calibration Sequence for Any Garage Workshop
For woodworkers setting up a table saw calibration routine for the first time, following this sequence prevents wasted effort from adjusting elements in the wrong order:
🪚 Check and correct blade-to-miter-slot alignment first, since everything else references this measurement
🪚 Check and correct blade tilt calibration at 90 and 45 degrees
🪚 Set and verify fence parallelism to the blade
🪚 Confirm fence lock rigidity under pressure
🪚 Install or adjust the splitter and riving knife
🪚 Verify measuring tools before relying on them for fine adjustments
This sequence takes 30 to 45 minutes for a saw that has never been properly calibrated and significantly less time for routine maintenance checks on a saw already in good alignment.
👉 Book a demo today and see how Woodshop Master helps your shop grow without limits.
FAQ: Table Saw Cut Accuracy
How often should I recalibrate my table saw for accuracy?
Check blade-to-miter-slot alignment quarterly for a saw in regular weekly use, and check fence parallelism before any project requiring tight tolerances. A saw that has been moved or transported should always be rechecked before precision work.
What tools do I need to calibrate a table saw properly?
A dial indicator provides the most precise readings for blade runout and miter slot alignment. A reliable engineer’s square is essential for blade tilt calibration. A digital angle gauge is useful but not strictly required if your square and stop screws are accurate.
Can I achieve furniture-grade accuracy on a contractor saw, or do I need a cabinet saw?
Yes, a well-calibrated contractor saw can achieve the same practical accuracy as a cabinet saw for furniture work. Cabinet saws have heavier trunnions that hold calibration longer between adjustments, but the achievable accuracy with correct setup is comparable on both saw types.
Why does my saw lose calibration after I change blades?
Blade changes can introduce small amounts of arbor flange contamination or slight shifts in the blade seating if the arbor washer is not reinstalled consistently. Cleaning the flange and washer each time and reseating carefully reduces this issue significantly.
Does table saw accuracy matter for rough construction cuts?
Less so than for furniture and cabinetry, where joint tolerances are tight. For framing and general construction, small deviations rarely affect the finished result. For furniture, cabinetry, and any project with glue joints or visible seams, calibrated accuracy directly affects fit and finish quality.
