Why Wood Stain Goes Blotchy and How to Get an Even Finish
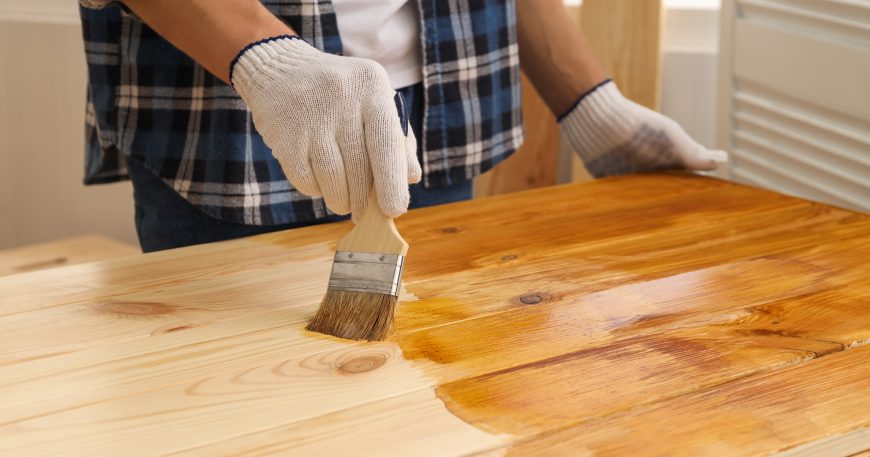
You sand the piece carefully, wipe it clean, and apply the stain evenly. Then you watch dark splotches appear in some areas while other sections barely absorb any color at all. The result looks nothing like the even, rich tone on the can.
Blotchy wood stain is one of the most discouraging finishing problems in a garage workshop because it shows up after the project is already built. The surface prep happened, the sanding happened, everything seemed fine. Understanding why blotching occurs and how to prevent it before the first coat goes on is the difference between a finished piece that looks professional and one that gets sanded back to bare wood.
Why Does Wood Stain Go Blotchy?
Blotchy stain happens when different areas of the wood absorb stain at different rates. Dense grain areas absorb less, loose grain areas absorb more, and the result is an uneven patchwork of light and dark rather than consistent color across the surface.
The root cause is almost always in the wood species, the surface preparation, or both.
Soft and Porous Wood Species Blotch by Nature
Pine, poplar, birch, and alder are the most common offenders in a beginner workshop because they are affordable, widely available, and easy to work. They are also highly prone to blotching because their grain structure is irregular. Dense late wood bands sit next to soft early wood, and each absorbs stain at a completely different rate.
Cherry and maple blotch for a different reason. Their grain is tight and consistent, but they have a tendency to absorb stain unevenly based on subtle surface variations that are invisible before finishing. Maple in particular is one of the most difficult woods to stain evenly without preparation steps.
Hardwoods like oak, walnut, and ash have open, consistent grain that accepts stain more predictably. They are not completely immune to blotching but are significantly more forgiving than the species listed above.
Uneven Sanding Leaves Inconsistent Surface Texture
Switching from 80-grit to 220-grit in one step without working through the intermediate grits leaves deep scratches from the coarser paper that absorb more stain than the surrounding surface. The result is visible scratch patterns that show up as dark streaks under the stain.
Finishing with too fine a grit, typically anything above 180 to 220 on most woods, burnishes the surface. Burnished wood resists stain penetration, which creates light patches that contrast sharply against areas that absorbed normally. Surface quality before finishing starts at the cut, and that includes getting clean plywood edges before sanding begins.
End Grain Absorbs Stain Much Faster Than Face Grain
End grain is essentially the open ends of wood fibers, and it acts like a sponge compared to face grain. On table legs, box corners, and any edge where the cut exposes end grain, stain soaks in much deeper and reads significantly darker than the surrounding face grain surfaces.
This is not a defect in the wood. It is a structural characteristic that requires a specific preparation step to control.
Leftover Glue and Finish Residue Block Absorption
Glue squeeze-out that gets sanded rather than removed leaves a thin film on the surface that resists stain. The area under the dried glue absorbs little or no color while the surrounding wood absorbs normally, creating a ghost outline of the joint line after staining.
The same problem happens with finish residue, machine oil transferred from equipment surfaces, or hand oils from handling the piece before finishing.
How to Prevent Blotchy Stain Before You Open the Can
Use a Pre-Stain Wood Conditioner on Prone Species
A pre-stain wood conditioner is the most reliable single step for reducing blotchiness on pine, poplar, birch, and soft maple. It works by partially filling the porous areas of the grain before stain is applied, reducing the difference in absorption rate between dense and loose areas.
Apply the conditioner with a brush or rag, allow it to penetrate for the time specified by the manufacturer (typically five to fifteen minutes), and apply the stain while the conditioner is still slightly wet. Do not let the conditioner dry completely before staining because a fully dried conditioner layer can actually reduce stain penetration too much and produce a washed-out result.
Conditioner does not completely eliminate blotching on the most problematic species. On figured maple or wild-grained pine, it reduces the problem significantly but rarely eliminates it entirely. For those cases, a toning approach or gel stain produces better results.
Sand Through Proper Grit Progression
Work through grits sequentially. A typical progression for furniture projects is 80 or 100 grit to remove mill marks and defects, followed by 120, then 150, then 180. Finish at 180 or 220 depending on the species and the stain type being used.
Each grit removes the scratch pattern left by the previous grit. Skipping grits means the coarser scratches survive under the finer ones and become visible under stain.
After the final sanding pass, sand lightly by hand in the direction of the grain with the finish grit. Power sanding leaves circular patterns from random orbital motion that show under certain stains, particularly on woods with light, reflective grain like maple or cherry.
Treat End Grain Before Staining
End grain requires its own preparation step separate from the face grain. The most practical method in a garage workshop is to apply a diluted wash coat of the same finish you plan to use as a topcoat, thinned by approximately fifty percent with the appropriate solvent.
For an oil-based finish, thin a small amount with mineral spirits and brush it onto the end grain only. Allow it to dry completely, sand lightly with 220 grit, and then apply stain across the entire piece. The wash coat partially seals the end grain fiber openings, reducing the absorption difference between end and face grain.
An alternative is to apply the stain to the face grain first and then apply a more diluted mixture to the end grain. This takes more control and practice but avoids the wash coat step.
Remove All Glue Before Final Sanding
Glue residue must be removed completely before any finishing step. Dried yellow glue (PVA) looks transparent after drying and is easy to miss under shop lighting. A raking light held at a low angle across the surface makes glue spots visible before sanding begins.
Scrape visible squeeze-out with a sharp chisel when it reaches a rubbery consistency, typically thirty to sixty minutes after clamping depending on shop temperature. Scraping at this stage removes the bulk of the glue without smearing it into the surrounding grain the way wet removal tends to do.
Should You Use Gel Stain Instead of Liquid Stain?
Gel stain is a practical solution for blotch-prone species when conditioner alone is not producing acceptable results. Gel stain sits on the surface rather than penetrating deeply, which means it relies less on consistent grain absorption and more on surface contact time and application technique.
The tradeoff is reduced color depth and a slightly different visual character than a penetrating liquid stain. Gel stain produces a more uniform, flatter color that lacks the grain pop of a well-applied penetrating stain on a cooperative species like walnut or oak.
For pine furniture, painted kitchen boxes, and beginner projects where color consistency matters more than grain character, gel stain is a reliable choice. For hardwood furniture where the grain is part of the visual appeal, conditioner preparation with a quality liquid stain generally produces better results.
Does Sanding Grit Really Affect Stain Absorption That Much?
Yes, more than most beginners expect. The grit you finish with directly determines how open or closed the wood surface is, and that affects both the depth of stain penetration and the evenness of color.
A surface finished at 120 grit absorbs stain noticeably darker than the same wood finished at 220 grit because the coarser scratches create more surface area for the stain to penetrate. Neither is wrong, but consistency within a single project is critical. If one board was finished at 150 and another at 220, they will read as different colors under the same stain even if they came from the same tree.
Standardizing your final sanding grit across all components of a project before staining eliminates one of the most common sources of color variation in finished work. Keeping scrap pieces from the same boards for test cuts and finish samples is also a practical habit covered in how to handle offcuts so they stay useful.
👉 Book a demo today and see how Woodshop Master helps your shop grow without limits.
FAQ: Blotchy Wood Stain Problems
Why does pine stain so unevenly compared to oak?
Pine has a highly irregular grain structure with soft earlywood and dense latewood bands that absorb stain at very different rates. Oak has open, consistent grain that accepts stain much more evenly. Pre-stain conditioner is essential for pine when using penetrating liquid stains.
Can I fix blotchy stain after it has already dried?
Minor blotching on a non-critical surface can sometimes be corrected by applying additional coats of stain to the lighter areas. On finished furniture faces, the most reliable fix is to strip the stain, sand back to bare wood, apply conditioner, and start again. Blotching that has dried and been topcoated is very difficult to correct without full refinishing.
Is gel stain better than liquid stain for beginners?
Gel stain is more forgiving on difficult species and produces more consistent results without preparation steps. It is a practical choice for beginners working with pine or poplar. It does not produce the same depth of color or grain enhancement as a well-applied liquid stain on cooperative hardwoods like walnut or oak.
Does wood conditioner change the final color of the stain?
Yes, slightly. Conditioner reduces overall stain penetration, which typically produces a lighter final color than the same stain applied without conditioner on the same species. Testing on scrap from the same board before finishing the project lets you adjust the stain application or choose a darker stain to compensate.
Why does the end grain on my project look so much darker than the rest?
End grain absorbs stain many times faster than face grain because the open ends of the wood fibers act as channels that pull stain deep into the material. A wash coat of diluted finish applied to end grain before staining is the most reliable way to reduce the contrast between end grain and face grain color.

