
How to Organize a Small Garage Workshop When Space Is the Real Problem
Most garage workshop advice assumes you have a dedicated space. A full two-car bay, empty walls, and room to walk around every tool without turning sideways. That is not the reality for most people starting out.
If your shop shares space with a car, lawn equipment, holiday boxes, and a water heater, the organization problem is not about finding better storage products. It is about making a functional workspace out of a space that was never designed for woodworking. That requires a different approach entirely.
Why Small Garage Workshops Fail Before Any Wood Gets Cut
Small garage workshops fail for one consistent reason: everything competes for the same floor space. The result is a shop where setup takes 20 minutes before every session, tools live on the floor because there is nowhere else to put them, and the car gets parked in the driveway permanently because the garage became unusable.
The fix is not buying more storage. It is rethinking how the space functions in zones rather than treating it as a single room where everything happens everywhere.
The One-Car Garage Reality
A standard one-car garage gives you roughly 200 to 240 square feet. Subtract the car, the water heater, the HVAC equipment, and the path to the house door, and you are left with somewhere between 80 and 120 usable square feet for a workshop.
That is enough to build real furniture and complete serious projects, but only if every inch is deliberate. Wasted wall space and floor space used for storage rather than work are the two most common killers of small shop functionality.
Why Most Organization Attempts Do Not Stick
The typical approach is to buy a pegboard, hang a few tools, and call it organized. Two months later the pegboard has three things on it, everything else is piled on the workbench, and the floor is covered again.
Organization in a small garage workshop fails when it is based on storage products rather than workflow logic. The same pattern that causes woodworkers to lose an hour a day searching for parts and tools they own but cannot find. The question is not where to put things. It is what you actually need within arm’s reach while working, and what can live further away.
How to Zone a Small Garage Workshop
Zoning is the single most effective strategy for small garage workshops. It means assigning specific functions to specific areas so the shop can switch from car storage to work mode in under five minutes.
A functional small shop needs three zones at minimum.
Zone 1: The Active Work Area
This is where cutting, assembly, and finishing happen. It needs to be the largest zone and must be kept clear of permanent storage. In a one-car garage, this is typically the center of the space where the car would sit.
The work area needs one solid workbench. A workbench against the back wall with a front vise is the most efficient layout because it keeps the center floor open. The bench does not need to be large. A 24-inch deep by 60-inch wide bench is enough for most furniture projects and leaves room to move around material. It also gives you a stable surface for sheet goods, and that makes a real difference when cutting plywood without tear-out.
Zone 2: Tool Storage and Access
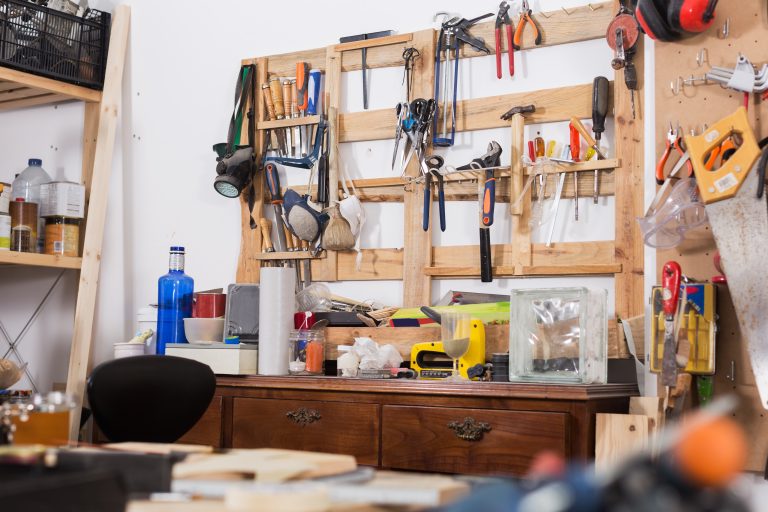
This zone lives on the walls. Wall-mounted storage keeps tools off the floor and off the workbench, which are the two places tools pile up and create chaos in small shops.
The priority for wall storage is your most-used tools first. The tools you reach for every session should be within arm’s reach of the bench. Tools you use monthly can go higher or further away.
Zone 3: Material and Lumber Storage
Lumber and sheet goods are the biggest space problem in small garage workshops because they are large, awkward, and usually end up leaning against walls or sitting on the floor in the middle of the work area.
A vertical lumber rack takes up roughly 12 inches of floor depth against a wall and holds significantly more material than a horizontal pile. For sheet goods like plywood, a wall-mounted vertical panel rack or a simple 2×4 frame leaning against the wall keeps panels organized and accessible without consuming floor space. The same logic applies to managing offcuts so they stay useful instead of becoming clutter.
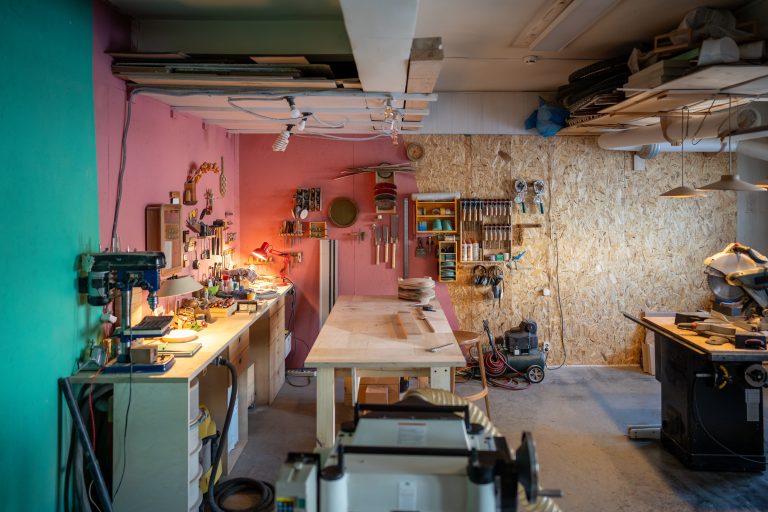
Wall Storage Systems That Actually Work in Small Garages
The walls are the most underused resource in a small garage workshop. Most shops use maybe 20 percent of available wall space. Getting to 60 or 70 percent wall utilization typically solves the floor clutter problem without buying a single new tool cabinet.
French Cleat Systems
A French cleat wall is the most flexible storage solution for a garage workshop. It consists of horizontal strips of plywood cut at a 45-degree angle and mounted across the wall, creating a system where any holder, shelf, or tool mount can be hung anywhere and repositioned in seconds.
The advantage over pegboard is load capacity and flexibility. A properly built French cleat wall holds hand tools, power tools, clamps, jigs, and small parts bins. As your tool collection changes, the storage configuration changes with it without drilling new holes.
Mobile Tool Bases
In a shared garage, the ability to move tools out of the way is as important as storing them. Mobile bases under a table saw, bandsaw, or drill press turn a fixed obstacle into a tool you can roll into position when needed and push against the wall when not in use.
This single change often recovers 30 to 40 square feet of usable floor space in a one-car garage because the tools are no longer occupying prime work area permanently.
Overhead Storage for Seasonal and Rarely Used Items
The ceiling area above head height is usable storage for items accessed infrequently. Ceiling-mounted platforms or overhead racks made from 2x4s and plywood hold finishing supplies, extra sandpaper, hardware bins, and seasonal items that would otherwise take up wall or floor space.
This keeps the walls free for tools and the floor free for work.
The 5-Day Small Garage Workshop Setup Plan
Reorganizing a shared garage workshop does not have to happen in one overwhelming weekend. This plan breaks it into manageable daily sessions.
Day 1: Empty and assess. Pull everything out of the garage. Categorize into: tools you use regularly, tools you use occasionally, materials, and items that do not belong in the shop. Donate, sell, or relocate everything in the last category. Most people discover they have been storing 30 to 40 percent non-workshop items in their shop space.
Day 2: Define the three zones. Mark the work area, tool storage wall, and material storage area with painter’s tape on the floor. Do not move anything yet. Walk the layout and verify the work area is large enough to handle your largest project material.
Day 3: Build or install wall storage. Mount your French cleat system, pegboard, or wall-mounted shelving. Install the lumber rack or panel storage system. Get tools and materials off the floor before anything else.
Day 4: Set up the workbench and tool placement. Position the workbench and mount most-used tools within arm’s reach. Install mobile bases on heavy tools. Verify you can move from bench to saw to assembly area without stepping over anything.
Day 5: Test the workflow. Run a simple project through the space. Cut a piece of material, bring it to the bench, make a dry assembly. Note every moment you had to move something out of the way or could not find what you needed. Fix those friction points before they become habits.
What to Prioritize When Budget Is Limited
Not every small garage workshop has room in the budget for a full French cleat system and new mobile bases at once. When budget is limited, the priority order is: Workbench first. Without a solid, dedicated work surface nothing else functions correctly.Lumber storage second. Getting material off the floor recovers more usable space per dollar than almost anything else.Mobile bases third, starting with the heaviest and most-used tool.Wall tool storage last, because hand tools and smaller power tools can live on a temporary shelf while the higher-priority items are sorted.
👉 Book a demo today and see how Woodshop Master helps your shop grow without limits.
FAQ: Small Garage Workshop Organization
Can I run a real woodworking shop in a one-car garage?
Yes. A one-car garage is enough space for serious furniture projects, cabinetry work, and most woodworking disciplines. The constraint is not total square footage but how efficiently the available space is used. Shops in 80 to 100 square feet produce professional-quality work when the layout is deliberate.
What is the most important tool to have on a mobile base in a small shop?
The table saw. It is typically the largest and heaviest tool in a garage workshop and the one that consumes the most floor space. A table saw on a mobile base can be rolled into the center of the garage for use and pushed against the wall when not in use, recovering significant floor space for assembly and finishing work.
How do I store full plywood sheets in a small garage?
A vertical panel rack is the most space-efficient solution. Two 2×4 uprights bolted to a wall stud with horizontal pegs or a simple A-frame leaning rack hold full 4×8 sheets vertically without consuming floor space. Sheets stored flat on the floor consume six to eight square feet of prime work area and are difficult to access without moving everything on top.
Should I insulate and climate control a garage workshop?
For most hobbyist woodworkers, basic weatherstripping on the garage door and a portable heater or fan is sufficient. Full insulation and HVAC is a significant investment that makes sense for year-round professional use. The priority for most small shops is getting the layout functional first, then improving comfort as budget allows.
How do I keep the car in the garage and still have a workshop?
The key is mobile everything. Tools on mobile bases, a fold-down workbench on the wall, and a rolling tool cart mean the workshop compresses against the walls in under ten minutes. The car goes in, the tools are against the walls, and the shop is ready to expand again next session.

